
Preserving flowers from a special occasion is a wonderful way to hold onto precious memories. This guide is your go-to resource for turning a beautiful bouquet into a lasting keepsake.
We will walk you through the best methods for how to preserve flowers right here in your Singaporean home. From simple air-drying and pressing to using silica gel and resin for a perfect finish, you will learn the techniques to maintain their colour and shape.
With the right approach, you can transform your sentimental flowers into beautiful mementos that last for years.
Why Preserve Flowers? Turning Moments into Mementos
Flowers are often at the heart of our most important celebrations. Learning how to preserve a bouquet allows you to capture the essence of those moments and keep a physical reminder of the joy they represent.
Capturing Sentimental Value
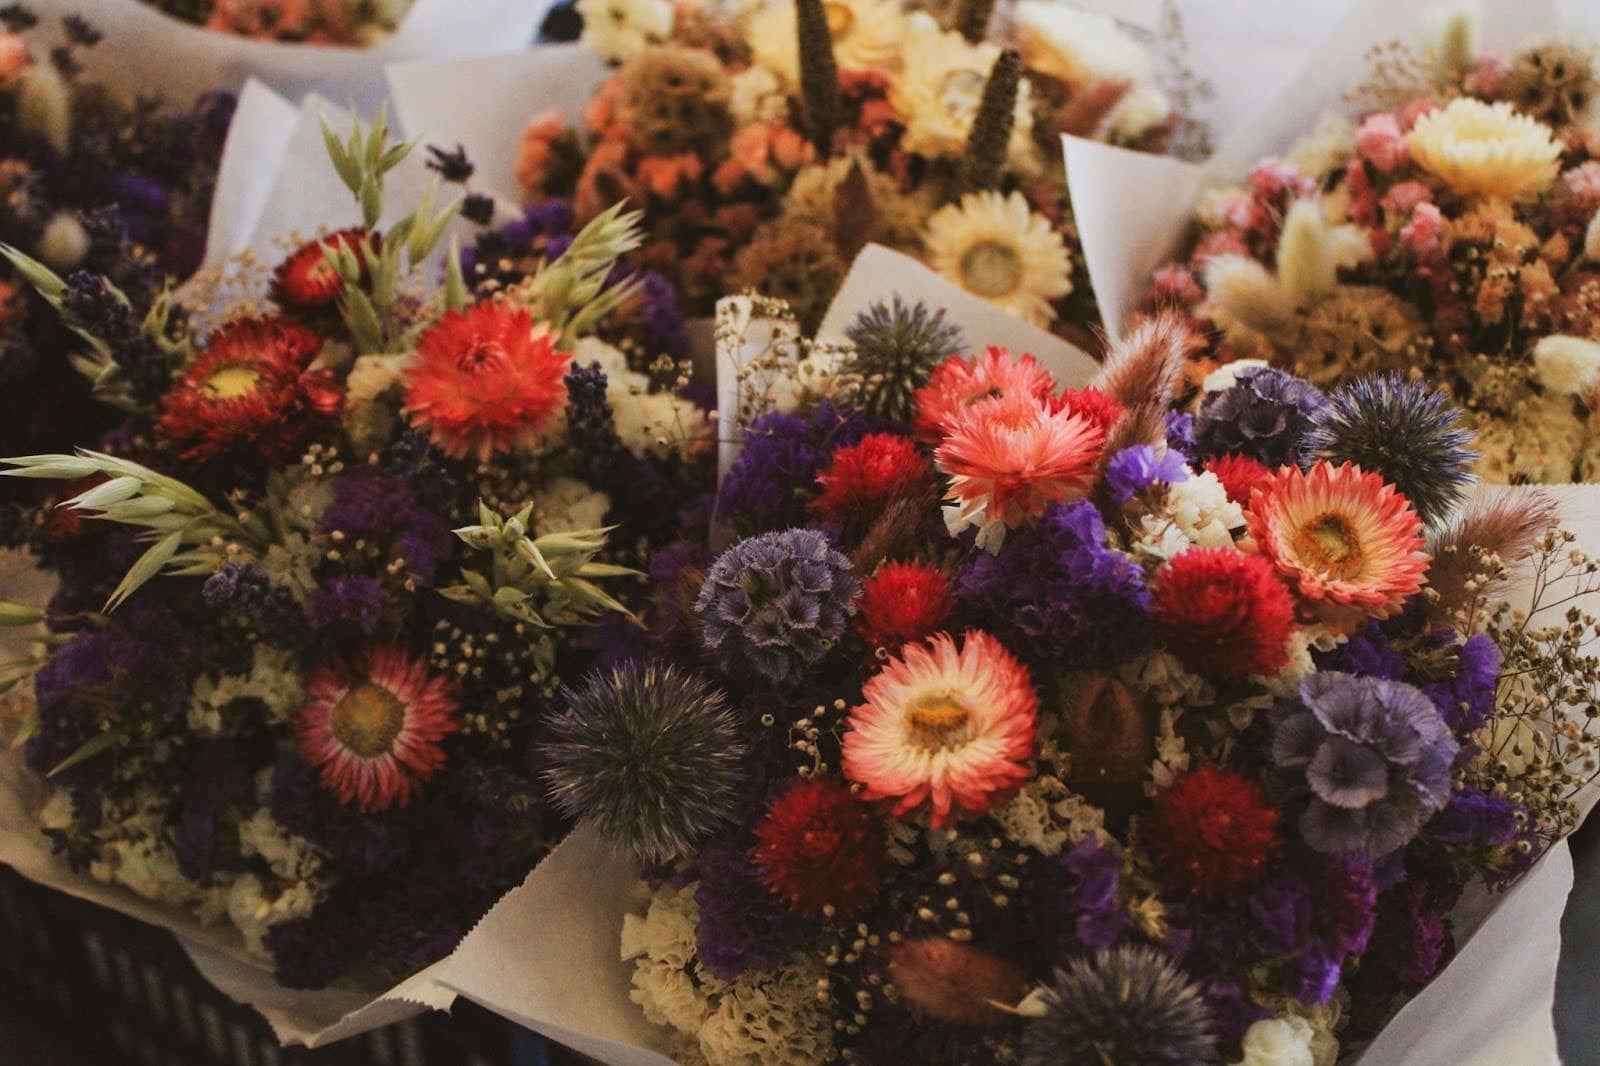
A bouquet is more than just a collection of blooms; it is a symbol of love, achievement, or remembrance. Preserving wedding flowers, anniversary roses, or a graduation bouquet transforms them from a temporary gift into a permanent keepsake.
These preserved arrangements serve as a beautiful, tangible link to your most cherished memories, allowing you to revisit those feelings long after the event has passed. It is a way to honour the sentimental value attached to them.
Creating Unique Home Decor
Beyond their sentimental worth, preserved flowers offer a unique and personal way to decorate your home. Unlike shop-bought decorations, items made from your own flowers are one-of-a-kind.
Pressed flowers can be framed to create delicate wall art, while blooms preserved in resin can become stunning paperweights or coasters. A dried flower arrangement in a vase adds a rustic, timeless touch to any room. This DIY flower preservation project allows you to create decor that tells your family’s story.
A Sustainable and Mindful Hobby
Flower preservation is an excellent hobby that is both sustainable and relaxing. Instead of throwing flowers away once they begin to wilt, you give them a new purpose.
The process itself can be a mindful activity, requiring patience and gentle care, offering a peaceful break from a busy day. It’s a creative outlet that results in something beautiful and lasting, making it a rewarding experience for anyone.
Essential Preparation: What to Do Before You Begin

Proper preparation is the most important step for achieving beautifully preserved flowers. A good preparation will go a long way for any type of flower. What you do before you start the main process will directly impact the final quality, colour, and shape of your blooms.
Selecting the Right Flowers for Preservation
The success of your project begins with choosing the right flowers. For the best results, start the preservation process when the flowers are at their peak freshness or just slightly before. Avoid using flowers that have already started to wilt or turn brown, as they will not preserve well.
- Ideal flowers for beginners: Sturdier flowers like roses, lavender, baby’s breath, statice, and carnations are excellent choices as they hold their shape and colour well.
- More challenging flowers: Blooms with a high water content, such as lilies, tulips, and daffodils, can be more difficult to preserve and may require more advanced techniques like using silica gel to prevent them from rotting.
Gathering Your Supplies
Before you start, gather all the necessary tools. Having everything ready will make the process smoother. The specific supplies will depend on your chosen method, but here is a general list:
- Sharp scissors or pruning shears
- String, rubber bands, or floral wire
- A dark, dry, and well-ventilated space (for air-drying)
- Airtight containers (for silica gel)
- Parchment paper and heavy books or a flower press (for pressing)
- Epoxy resin kit and moulds (for resin preservation)
- Gloves for protection
Preparing Your Flowers for the Process
Once you have your flowers and supplies, it is time to prepare them. This preparation stage is universal for most flower preservation methods.
- Remove excess foliage: Gently strip away any leaves and thorns from the lower part of the stem. These parts hold a lot of moisture and can slow down the drying process or cause decay. You can leave a few leaves near the top for a more natural look if desired.
- Trim the stems: Cut the stems to your desired length using sharp scissors. An angled cut can help with certain preservation methods.
- Group your flowers: If you are air-drying, group the flowers into small bundles of the same type. This ensures they dry evenly. Secure each bundle with a rubber band or string.
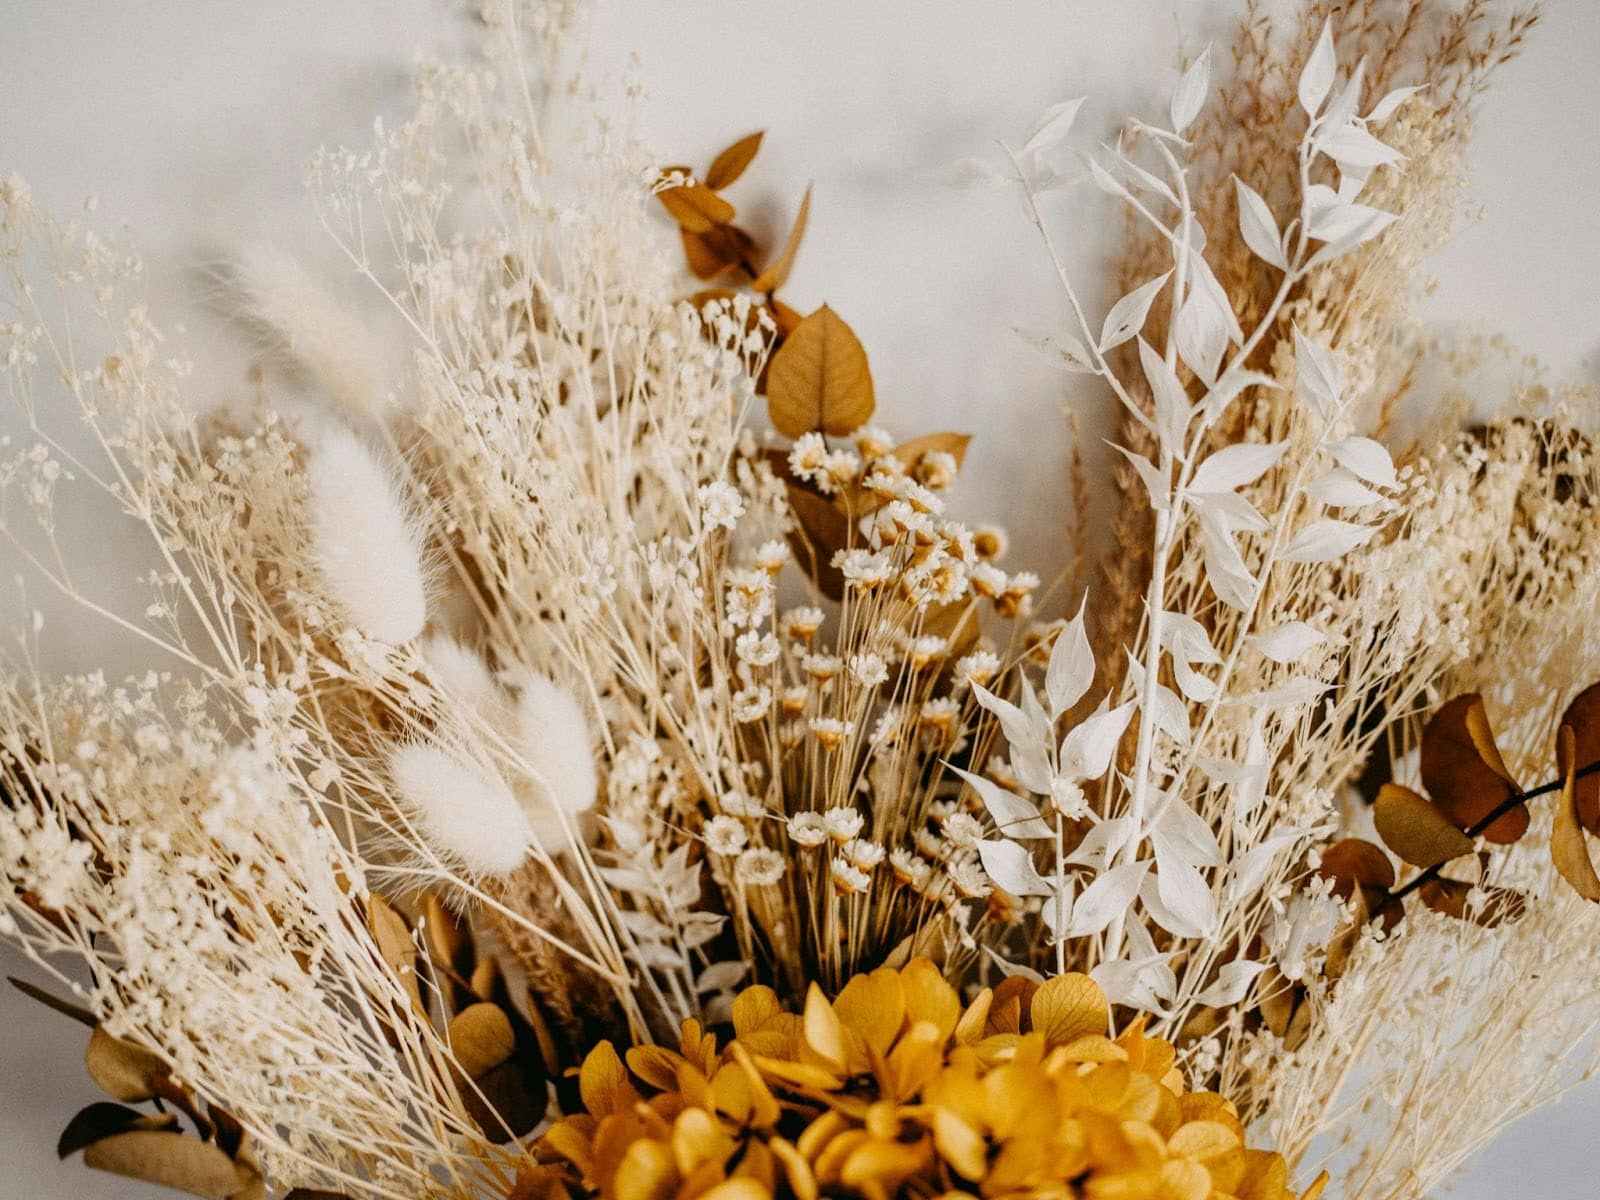
Method 1: Air-Drying Flowers – The Classic Technique
Air-drying is one of the oldest and simplest methods of how to dry flowers. It requires minimal supplies and is a great starting point for anyone new to flower preservation.
What is Air-Drying?
Air-drying is the process of removing moisture from flowers naturally by hanging them upside down. This position helps the blooms retain their shape as they dry, preventing them from drooping. It is a cost-effective technique that works exceptionally well for creating rustic-looking dried flower arrangements.
Best Flowers for Air-Drying
This method is best suited for robust flowers with low moisture content and sturdy stems. Excellent candidates for air-drying include:
- Roses
- Lavender
- Statice
- Strawflower
- Baby’s breath
- Celosia
- Yarrow
Step-by-Step Guide to Air-Drying
- Prepare the flowers: Following the preparation steps above, remove unwanted leaves from the stems and trim them.
- Bundle them: Group three to five stems together and secure them with a rubber band. Creating small bunches allows for better air circulation around each bloom.
- Hang them upside down: Find a suitable spot to hang your flower bundles. You can use a hook, a clothes hanger, or even a simple rack. Hanging them upside down uses gravity to keep the stems straight and the petals in place as they dry.
- Choose the right location: The ideal drying spot is dark, dry, and has good airflow. A spare room, a dry corner of a storeroom, or an airy cupboard works well. In Singapore’s humid climate, good ventilation is key to preventing mould. You may consider placing a dehumidifier in the room to speed up the process. Avoid direct sunlight, as it will cause the colours to fade.
- Wait patiently: The drying time can range from two to four weeks, depending on the type of flower and the humidity levels. You will know they are ready when the petals feel crisp and stiff to the touch and the stems snap easily.
Tips for Maintaining Colour and Shape
To get the best results from air-drying, keep these tips in mind. Start with flowers that have vibrant, deep colours, as some fading is natural. For a little extra protection once they are fully dry, you can apply a light mist of unscented hairspray to help strengthen the delicate petals.
Method 2: Using Silica Gel To Preserve Flowers
For those who want to preserve the vibrant colour and natural shape of their flowers, using silica gel is an excellent option. This method is much faster than air-drying and delivers more life-like results.
What is Silica Gel?
Silica gel is a desiccant, which is a substance that absorbs moisture. It comes in the form of small, sand-like crystals. When flowers are buried in it, the gel draws out the water from the petals and stems quickly, dehydrating them while maintaining their original appearance. It is the same material found in small packets in new shoes or bags, but for flowers, you will need a larger quantity.
Why Choose Silica Gel?
The main advantage of using silica gel for preserving flowers is its ability to retain colour and shape exceptionally well. It is ideal for delicate, multi-petaled flowers like roses, peonies, and orchids that would flatten or lose their form with other methods. While it requires an initial investment in the gel, it is reusable, making it a cost-effective choice in the long run.
Step-by-Step Guide to Using Silica Gel
- Select a suitable container: Choose an airtight container that is large enough to hold your flower without squashing the petals. Plastic or glass containers with secure lids work best.
- Create a base layer: Pour about an inch or two of silica gel into the bottom of the container to create a base for the flower to rest on.
- Position the flower: Gently place the flower on top of the gel. For flowers with full, round blooms like roses, place them face up. For flat-faced flowers like gerbera daisies, it is better to place them face down. Trim the stem so the flower fits comfortably.
- Bury the flower: Carefully and slowly pour more silica gel around the flower. Use a spoon or your hands to ensure the gel gets between all the petals. Continue pouring until the flower is completely submerged. Be very gentle to avoid damaging its delicate structure.
- Seal and wait: Secure the lid on the container to make it airtight. Store it in a safe place where it will not be disturbed.
- Check for readiness: The drying time varies depending on the flower’s size and moisture content, but it typically takes between three to seven days. Some silica gels have blue indicator crystals that turn pink when they have absorbed their maximum moisture, which can help you know when the process is complete.
- Remove the flower: Once dried, gently tilt the container to pour out the silica gel and reveal the flower. Use a small, soft brush (like a makeup or paintbrush) to carefully remove any remaining crystals from the petals.
Reusing Your Silica Gel
One of the great benefits of silica gel is that it can be used repeatedly. Once it has absorbed moisture (and the indicator crystals have turned pink), you can reactivate it by spreading it on a baking tray and heating it in an oven at a low temperature (around 120°C) for a few hours until the indicator crystals turn blue again.
Method 3: Pressing Flowers For Art And Crafts
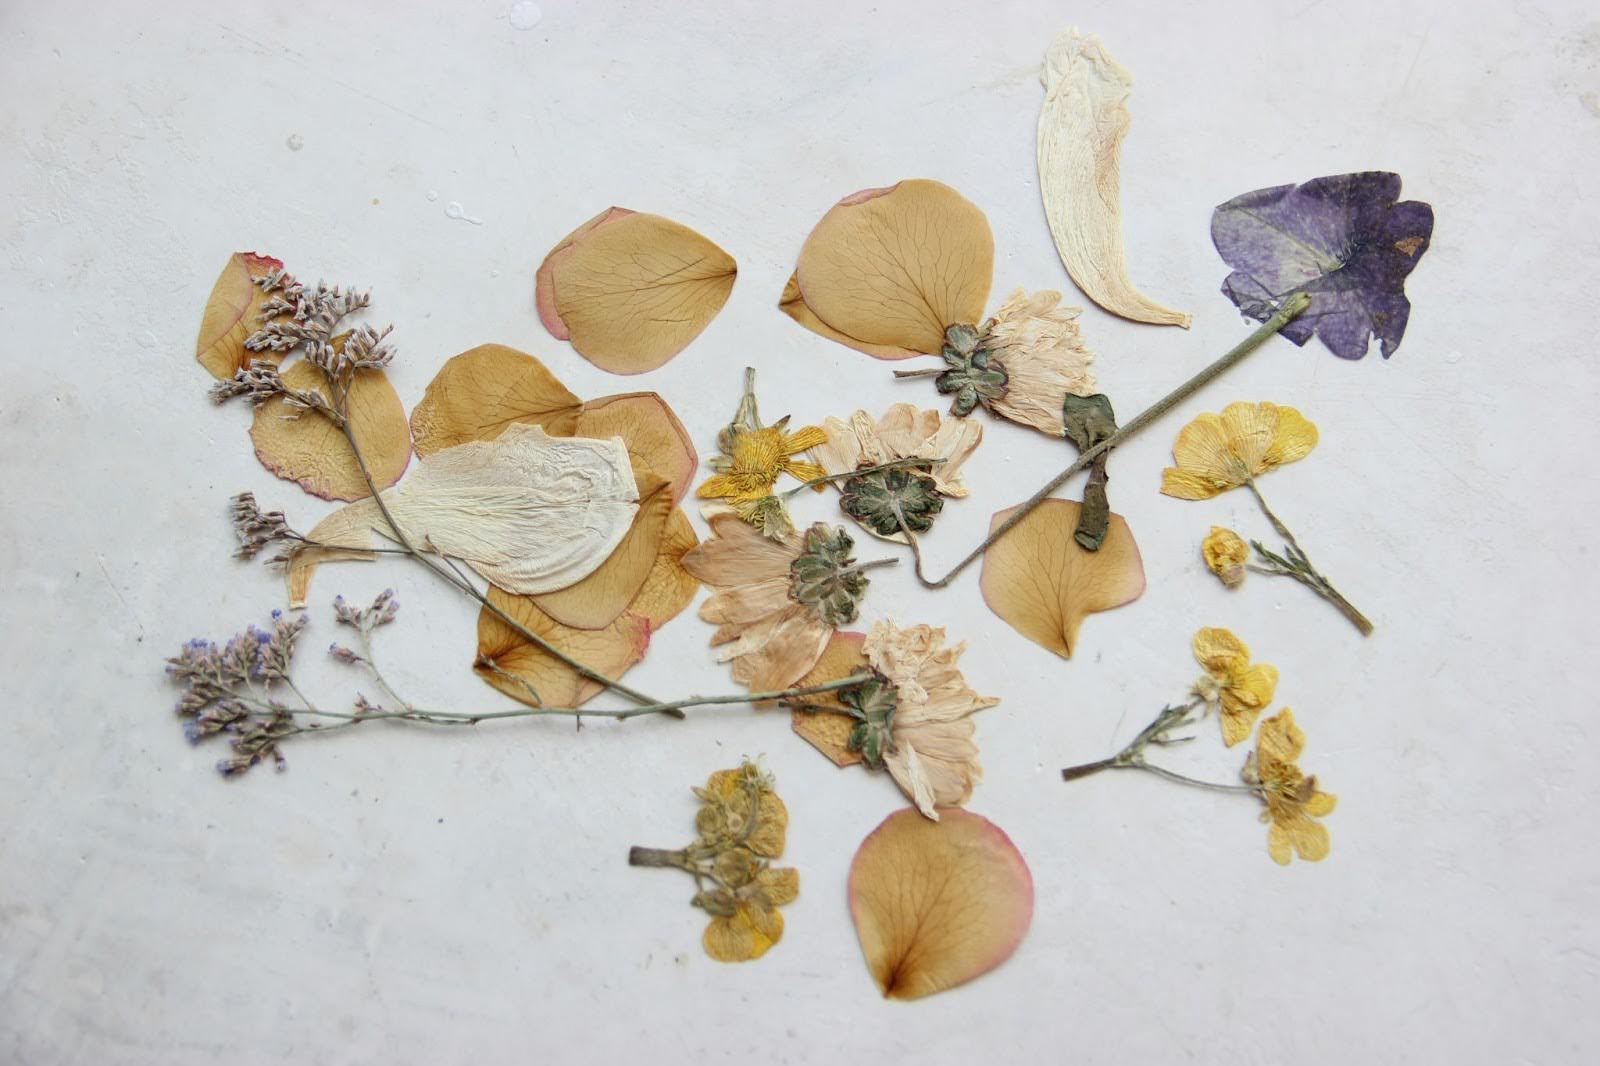
Pressing flowers is a traditional preservation method that flattens blooms, making them perfect for all kinds of artistic projects, from framed art to personalised stationery.
The Art of Pressing Flowers
This technique involves applying pressure to flowers over a period to squeeze out all the moisture. The result is a two-dimensional, paper-thin version of the bloom that beautifully preserves its colour and intricate details. It is a fantastic way to create a floral arrangement in a frame or a shadow box.
Best Flowers for Pressing
The best flowers for pressing are those with naturally flat faces and thin blooms. Bulky, dense flowers are difficult to flatten without looking misshapen. Some of the best choices include:
- Violets and pansies
- Cosmos and daisies
- Ferns and single-petal roses
- Forget-me-nots
- Hydrangeas (individual florets)
How to Press Flowers Using a Book
Using a heavy book is the most accessible way to start pressing flowers.
- Choose the right book: Select a heavy book that you do not mind potentially staining. Dictionaries and phone books work well.
- Prepare your pages: Open the book to the middle and line the pages with absorbent paper, such as parchment paper or coffee filters. This protects the book’s pages and helps absorb moisture.
- Arrange the flowers: Place your fresh flowers on the paper in a single layer. Make sure they do not overlap, as this can cause them to stick together. Arrange them exactly how you want them to look when pressed.
- Add a top layer: Place another sheet of absorbent paper over the flowers.
- Apply pressure: Carefully close the book. Place several other heavy books or objects on top to create enough pressure.
- Wait for them to dry: Leave the flowers to press for two to four weeks. You can check on them after the first week and change the absorbent paper if it feels damp. They are ready when they feel dry and papery.
Using a Professional Flower Press
A flower press offers a more professional approach. It consists of two pieces of wood connected by bolts and wing nuts, with layers of cardboard and paper inside.
- Disassemble the press: Unscrew the wing nuts and remove the top wooden board and layers of cardboard.
- Layer the flowers: Place your flowers between two sheets of absorbent paper, just like the book method.
- Stack the layers: Place the paper-and-flower sandwich onto a piece of cardboard inside the press. You can create several layers.
- Reassemble and tighten: Once all your flowers are inside, place the top wooden board back on and tighten the wing nuts evenly. The press provides consistent, firm pressure for excellent results. The drying time is similar to the book method.
Method 4: Preserving Flowers In Epoxy Resin
For a truly permanent keepsake, preserving flowers in resin is an incredible method. It encases the bloom in a crystal-clear, durable material, protecting it forever.
What is Resin Preservation?
Epoxy resin is a two-part liquid compound that, when mixed, undergoes a chemical reaction and hardens into a solid, transparent plastic. This process allows you to embed objects, like flowers, inside. The final pieces are durable and have a beautiful, glossy finish, perfect for making jewellery, paperweights, or decorative tiles.
Important First Step: Drying Your Flowers
You cannot place fresh flowers directly into resin. Flowers contain moisture, and this moisture will cause them to turn brown and rot inside the resin as it cures. Before you begin, your flowers must be completely dry. The best way how to dry flowers for resin is the silica gel method, as it preserves the flower’s 3D shape and vibrant colour. Air-dried or pressed flowers also work well.
Step-by-Step Guide to Resin Preservation
- Gather your supplies: You will need an epoxy resin kit (which includes the resin and hardener), silicone moulds in your desired shapes, mixing cups, stirring sticks, tweezers, and protective gear like gloves and safety glasses. Work in a well-ventilated area.
- Prepare the resin: Following the manufacturer’s instructions precisely, measure and mix the resin and hardener. Stir slowly but thoroughly for several minutes to combine them fully and minimise air bubbles.
- Pour the first layer: Pour a small amount of the mixed resin into your silicone mould to create a base layer. This prevents your flowers from sinking to the bottom.
- Arrange your flowers: Use tweezers to gently place your completely dried flowers into the resin layer. Arrange them in your desired design.
- Pour the final layer: Slowly pour the remaining resin over the flowers until they are completely covered and the mould is full.
- Remove air bubbles: After pouring, you will likely see small air bubbles rising to the surface. You can pop these by gently blowing on them through a straw or by quickly passing a heat gun or flame torch over the surface.
- Cure the resin: Cover the mould to protect it from dust and let it cure undisturbed. Curing time can take anywhere from 24 to 72 hours, depending on the brand of resin and the room’s temperature.
- De-mould your piece: Once the resin is fully hardened, you can flex the silicone mould to pop out your finished, beautifully preserved flower piece.
Other Preservation Techniques to Consider
Besides the main methods, there are a few other techniques you can explore for different effects or shorter-term preservation.
Using Hairspray for a Quick Fix
Many people wonder how to preserve fresh flowers with hairspray. It is important to know that hairspray is not a permanent preservation method. Instead, it acts as a sealant that can help a fresh or air-dried flower hold its shape and colour for a little longer.
It adds a protective layer that reduces shedding in delicate dried flower arrangements. To use it, simply hold an aerosol can of unscented hairspray about 15-20 cm away from the flower and apply a light, even coat.
Preserving with Wax
Preserving flowers with melted soy or paraffin wax gives them a delicate, porcelain-like appearance. This method coats the fresh petals, locking in their shape and colour for a few weeks or even months. To do this, melt wax in a double boiler, let it cool slightly, then quickly and gently dip each flower into the wax. The result is beautiful but very fragile.
How to Care For and Display Your Preserved Flowers
Once your flowers are preserved, proper care for your flowers will ensure they remain beautiful for as long as possible.
Protecting Them From the Elements
Preserved flowers are delicate. To maintain their beauty, you need to protect them from environmental factors that can cause damage or fading.
- Avoid direct sunlight: Sunlight is the biggest enemy of preserved flowers, as its UV rays will quickly bleach their colours. Display your arrangements in a spot that does not receive direct sun.
- Keep them dry: Moisture is another threat. Keep your preserved flowers away from humid areas like bathrooms or kitchens. In Singapore’s climate, this is especially important. A dried flower arrangement should never be watered.
Creative Display Ideas
There are many beautiful ways to showcase your preserved flowers and integrate them into your home decor.
- Shadow Box Display: A shadow box is perfect for displaying a whole preserved bouquet or a collection of special blooms. It protects them from dust while allowing you to see them from all angles.
- Framed Art: Arrange your pressed flowers on high-quality paper and frame them. You can create a simple, elegant display with a single bloom or a more complex collage.
- Vase Arrangements: A classic vase is a simple yet effective way to display air-dried or silica-dried flowers. Since they do not need water, you can use any type of container.
- Glass Cloche: A glass dome or cloche adds a touch of enchantment to a single, stunning preserved flower, like a rose, protecting it while making it a focal point.
Conclusion On How To Preserve Flowers
Preserving flowers is an accessible and deeply rewarding way to keep your cherished memories alive. This guide has shown you the most effective flower preservation methods, each with its own unique benefits. Air-drying is perfect for creating rustic arrangements, while preserving flowers with silica gel excels at maintaining their natural colour and shape.
Pressing allows for beautiful artistic creations, and using epoxy resin offers a permanent, crystal-clear keepsake. By starting with fresh blooms and choosing the right technique, anyone in Singapore can transform a meaningful floral arrangement into a memento that lasts a lifetime.
At BearloonSG, we believe that every celebration deserves a touch of wonder. While you master the art of preserving memories from your special days, let us help you create new ones. We craft stunning balloon and flower gifts that tell a story and bring joy. For your next celebration, choose a gift that sparks delight and builds memories worth preserving.
Contact us today.
Frequently Asked Questions About Preserving Flowers
What Is the Best Way to Preserve Flowers Permanently?
For true permanence, preserving flowers in resin is the best method. When properly dried and encased in epoxy resin, a flower is protected from air, moisture, and physical damage, allowing it to last indefinitely as a durable, glass-like keepsake.
How Do You Preserve Flowers So They Keep Their Colour?
Using silica gel is the most effective method for preserving the original colour of flowers. The gel is a desiccant that quickly absorbs moisture, a process that is much faster than air-drying. This rapid dehydration helps lock in the petals’ pigments before they have a chance to fade.
How Do You Preserve Flowers for a Year?
Several methods can preserve flowers for a year or longer. Air-drying, silica gel drying, and pressing can all make flowers last for many years if they are cared for properly. The key is to keep them out of direct sunlight and away from humidity, which can cause colours to fade and the flowers to become brittle.
Can You Preserve Fresh Flowers With Hairspray?
No, you cannot permanently preserve fresh flowers with hairspray. Hairspray can be used as a finishing touch on already dried flowers to give them a bit of extra protection from shedding. If sprayed on fresh flowers, it will not stop the natural wilting and decaying process.
Do You Dry Flowers Before Putting Them in Resin?
Yes, it is absolutely essential to dry flowers completely before putting them in resin. Any moisture left in the petals will react with the resin as it cures, causing the flower to turn brown, wilt, and eventually rot inside the finished piece. The best method for drying flowers for resin is using silica gel.
What Is the Liquid That Preserves Flowers?
The main liquid used for permanent preservation is epoxy resin, which hardens to encase the flower. For temporary preservation, some florists use a solution made of glycerin and water. The flowers absorb the glycerin, which replaces the water in their cells, keeping them soft and supple for a longer period.