
Balloon sculpting is a fantastic, creative activity for your child’s next birthday party or a fun afternoon at home. This guide covers everything you need to know, from essential tools to mastering basic balloon twists.
You will learn to create simple balloon twisting ideas like a classic balloon dog, a fun sword, and a pretty flower. We also share expert tips to prevent balloons from popping, ensuring a fun, frustration-free experience for you and your family. Get ready to learn how to make balloon sculptures for beginners.
Getting Started with Balloon Sculpting: Your Essential Toolkit
Before you attempt your first twist, you must have the correct supplies. Attempting beginner balloon art with standard party balloons will only lead to frustration. Here is what you need to get started.
Choosing the Right Balloons for Twisting
For balloon modelling, you cannot use the round balloons you hang on walls. You need specific modelling balloons. The industry standard is known as 260Q balloons.
The name is not random. The “2” stands for two inches in diameter, and the “60” stands for 60 inches in length when fully inflated. The “Q” often refers to Qualatex, a brand widely regarded by professionals as the best option.
Why does quality matter for beginners? Cheaper balloons found in general discount stores are often made of thinner latex. They pop much more easily, which can be discouraging when you are learning how to twist balloons. High-quality balloons are more durable, have better elasticity, and can withstand the friction and pressure of twisting.
In Singapore, you can find these specific twisting balloons at specialised party supply stores, some large craft stores, or through various online retailers. Investing in a pack of multi-coloured professional-grade balloons is the first step to success.
The Importance of a Good Balloon Pump
Never attempt to inflate twisting balloons with your mouth. It is extremely difficult because of the high pressure required to stretch the latex. It is also a safety hazard.
You need a designated balloon pump for twisting. For beginners, a dual-action hand pump is the best choice. “Dual-action” means the pump pushes air into the balloon on both the inward push and the outward pull of the handle. This makes inflating long balloons quick and effortless.
To use it correctly, slide the opening of the balloon (the nozzle) over the tip of the pump. Hold the balloon nozzle firmly against the pump tip with one hand, and use the other hand to operate the pump mechanism. Do not pump too aggressively, as this generates heat and weakens the latex.
Optional but Helpful Tools
While balloons and a pump are the only essentials, two other items are helpful for DIY balloon animals:
- Scissors: You may need to trim excess balloon material after tying off a sculpture to make it look neat.
- Permanent Markers: A black marker allows you to draw eyes, a mouth, or whiskers on your creations. This brings easy balloon sculptures to life and makes them more engaging for children. Ensure you use a marker that dries quickly to avoid smudging.
5 Basic Balloon Twisting Techniques
To create balloon animal tutorials for beginners, you must first understand the mechanics of twisting. It is not just about bending the balloon; it is about trapping air in specific segments to build a shape.
1. Inflating and Tying Your Balloon Properly
The most common mistake beginners make is inflating the balloon completely. When you twist a balloon, you displace air. If the balloon is fully inflated, there is nowhere for that air to go, representing a primary reason why the balloon pops.
You must always leave an uninflated tail at the end of the balloon. For most basic balloon animal instructions, leaving about a three to four-inch tail is standard. As you make twists, the air is pushed down into this tail, which will gradually inflate.
To tie the balloon, let a tiny amount of air out first to soften the nozzle area. Stretch the neck of the balloon around two fingers, pass the nozzle through the loop you created, and pull tight.
2. The Basic Twist
This is the foundation of all balloon art. It creates a single segment or “bubble.”
- Determine the size of the bubble you want to make.
- Hold the balloon in your non-dominant hand at the knotted end.
- Use your dominant hand to grasp the balloon further down at the point where you want the twist to be.
- Squeeze the balloon gently at that point with your thumb and forefinger.
- Twist your dominant hand three or four full rotations.
- Important: You must hold on to this twist, or it will untwist immediately. You must maintain your grip on the first and second segments to keep them separate.
Always twist the balloon in the same direction (e.g., always away from you) throughout the entire sculpture. This helps maintain the structural integrity of the finished piece.
3. The Lock Twist
A basic twist by itself will come undone. A lock twist secures two or more segments together. This is used to make ears, legs, and bodies.
- Inflate your balloon and make a basic twist to create the first bubble. Keep holding it.
- Make a second basic twist further down to create a second bubble.
- Make a third basic twist to create a third bubble.
- You now have three distinct bubbles while holding the remaining uninflated balloon.
- To “lock” the second and third bubbles together (for example, to make a pair of ears), fold the balloon so the second and third bubbles are side-by-side.
- Grasp both bubbles, pull them slightly away from the rest of the balloon to reduce friction, and twist them around each other three times.
- They are now locked in place and you can release your grip.
4. The Pinch Twist
This twist changes the direction of the balloon and adds detail. It creates a small, tight bubble that looks like a bear ear.
- Make a basic twist to create a small bubble, roughly one inch in diameter.
- Hold this small bubble with one hand.
- With your other hand, grasp the small bubble, pull it slightly away from the rest of the balloon, and twist it simultaneously.
- You are essentially twisting the bubble against itself.
- This creates a distinct segment that forces the rest of the balloon to turn at a 90-degree angle.
5. The Loop Twist
This is one of the simple balloon twisting ideas used for sword handles, flower petals, or large bunny ears.
- Inflate the balloon.
- Fold the balloon over to create a loop of your desired size.
- Grasp the point where the balloon overlaps (the knot end and the main body of the balloon).
- Squeeze this crossing point and twist the loop around three or four times.
- Pass the knot through the loop once to secure it completely.
Your First Balloon Sculptures: Step-by-Step Tutorials
Now that you understand the mechanics, let us apply them. After purchasing the right balloon, it is time for you to sculpt it to your vision. Here are three balloon twisting tutorials designed specifically for beginners.
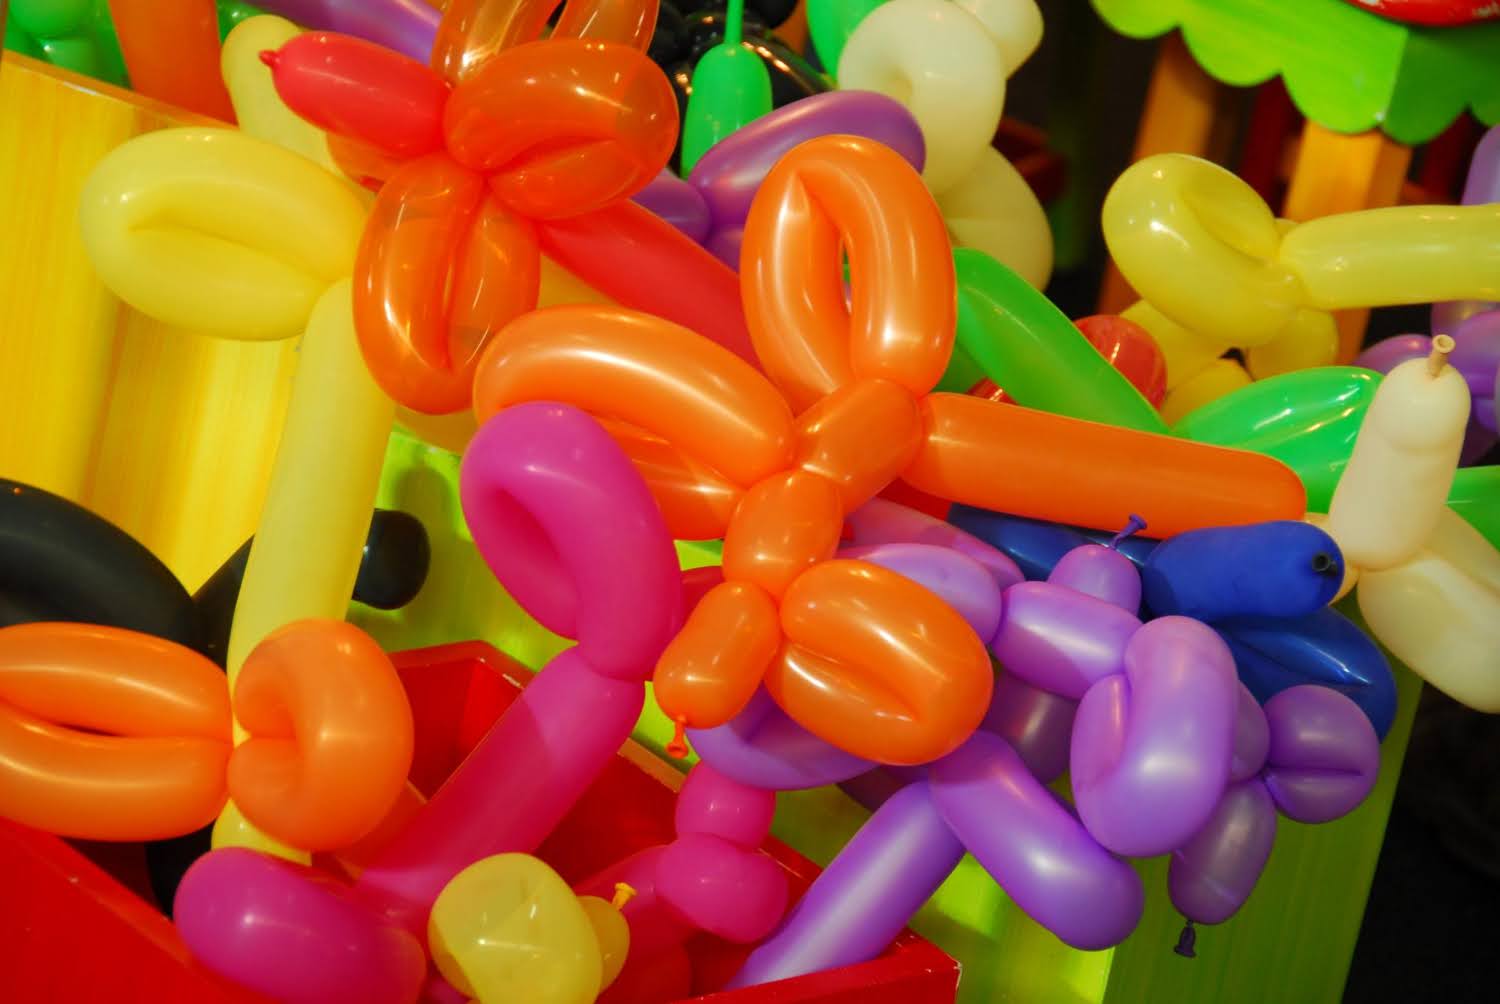
1. How to Make a Classic Balloon Dog
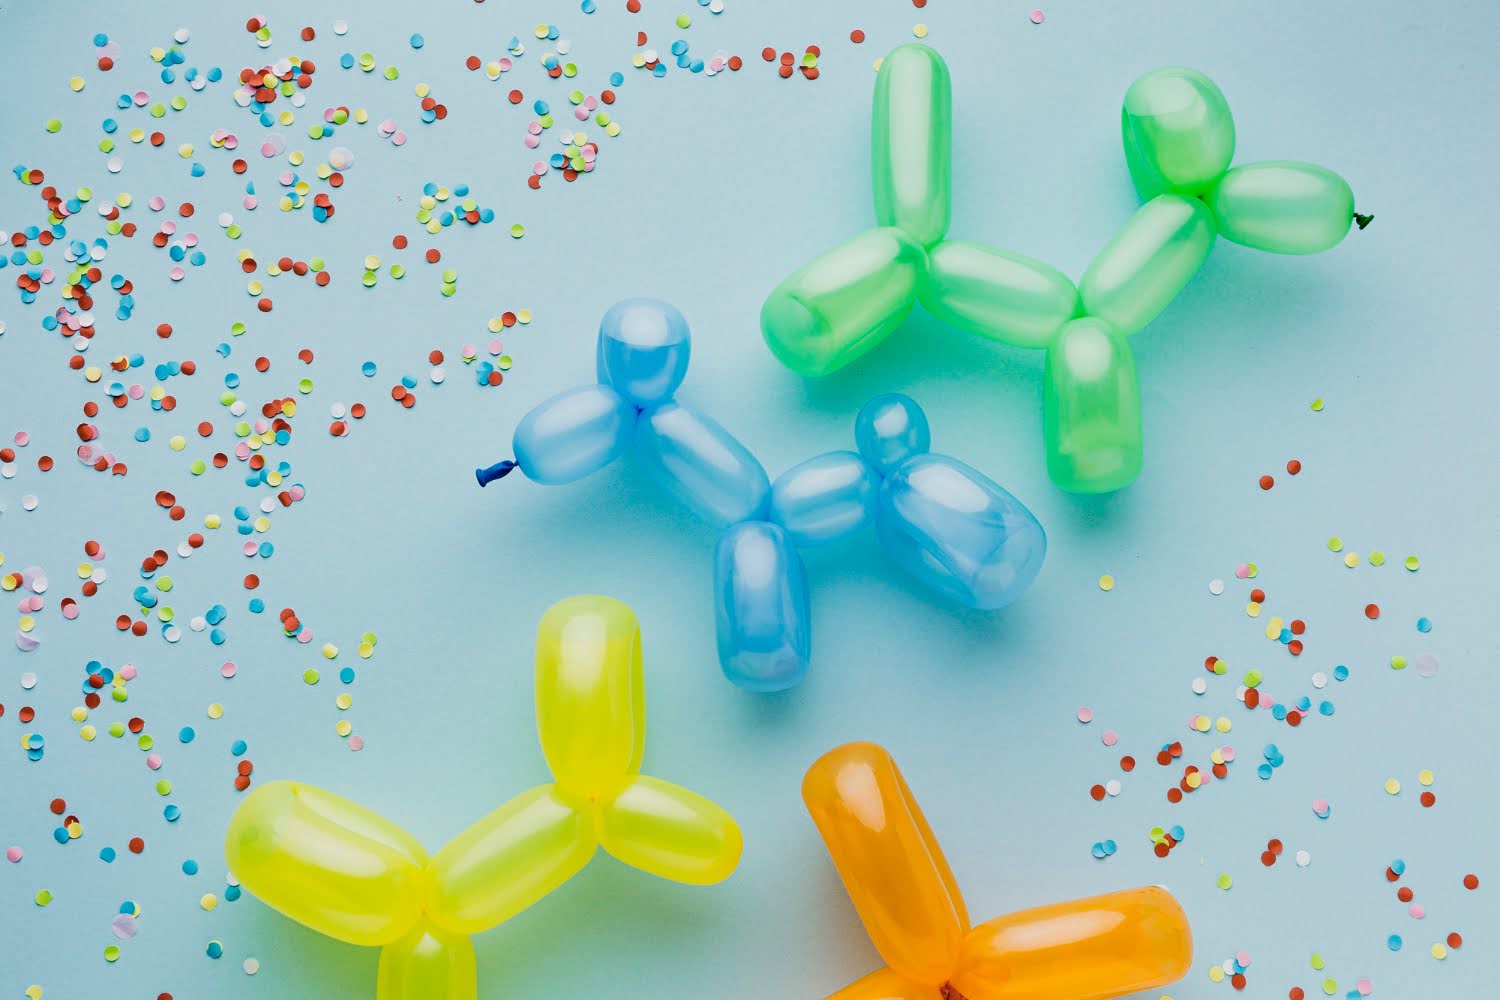
This is the most iconic of all DIY balloon animals. Mastering this teaches you the spacing and locking techniques required for almost all four-legged animals.
Materials: One 260Q balloon, pump.
- Inflate: Inflate the balloon, leaving about a three-inch uninflated tail. Tie the knot.
- The Snout: Starting at the knot end, make a basic twist about two inches long. Hold this twist.
- The Ears: Make two more basic twists of the same size (two inches each). You now have three bubbles. Fold the second and third bubbles together and perform a Lock Twist. You now have a head with a snout and two ears.
- The Neck: Make a basic twist about two inches long for the neck. Hold this twist.
- The Front Legs: Make two more basic twists, about three inches long each. Fold these two leg bubbles together and perform a Lock Twist. You now have the head, neck, and front legs.
- The Body: Make a basic twist about four inches long for the body. Hold it.
- The Back Legs: Make two more basic twists, about three inches long each (matching the front legs). Fold these two together and perform a Lock Twist.
- The Tail: The remaining inflated balloon forms the tail. There should still be a tiny bit of uninflated tip left. Adjust the legs and head so the dog stands up straight.
2. How to Make a Simple Balloon Sword
This is one of the easiest balloon sculptures and is always a hit at children’s parties.
Materials: One 260Q balloon, pump.
- Inflate: Inflate the balloon almost fully. Leave only about half an inch of tail. You want the sword to be firm. Tie the knot.
- The Handle: At the knot end, fold the balloon to create a loop that is large enough for a child’s hand to fit through comfortably.
- Secure the Loop: Perform a Loop Twist by twisting the knot end around the main body of the balloon at the base of the loop.
- The Crossguard: To make the handle secure and look like a sword, take the knot and push it through the centre of the loop you just created. Pull it out the other side. This locks the loop in place.
- Straighten: Straighten the long remaining section of the balloon. This is the blade. Your sword is complete.
3. How to Make an Easy Balloon Flower
This design introduces how to connect two separate balloons, which is a great step forward in beginner balloon art.
Materials: One pink (or any colour) 260Q balloon for petals, one green 260Q balloon for the stem, pump.
Part 1: The Petals
- Inflate the pink balloon, leaving a two-inch tail. Tie it off.
- Tie the nozzle end to the very tip of the tail end, creating a large circle out of the balloon.
- Find the exact opposite side of the circle from the knot. Squeeze the balloon there and twist it. You now have two large loops looking like a figure-eight.
- Place the two loops together like a sandwich. Find the centre point of these folded loops, squeeze, and twist. You now have four loops of roughly equal size.
- Arrange these four loops so they lay flat, resembling a four-petal flower.
Part 2: The Stem
- Inflate the green balloon, leaving a one-inch tail. Tie it off.
- At the nozzle end, make a one-inch basic twist.
- Immediately below that, perform a Pinch Twist. This forms the centre of the flower.
- Insert this pinch twist into the centre of the four pink petals. Adjust the petals so they sit around the green centre.
- Optional leaves: Halfway down the green stem, create a Loop Twist to represent a leaf.
Expert Tips to Avoid Popping and Other Common Problems
The sound of a popping balloon can be startling, but it is part of the learning process. Here is how to minimise it.
Why Do Balloons Pop When Twisted?
Balloons pop due to stress on the latex. This stress comes from three main sources:
- Over-inflation: If there is no room in the tail for air to move, the pressure builds until the latex fails.
- Friction: Rubbing dry latex against dry latex generates heat, which weakens the balloon.
- Sharp Objects: This includes long fingernails, jewellery, or rough surfaces on walls or tables.
Simple Tricks to Minimise Popping
Follow these rules to make your balloon twisting for kids’ parties a success:
- Burp the Balloon: After inflating to the desired length, release a small amount of air before tying the knot. This makes the balloon softer and more pliable.
- Squeeze Before Twisting: Before making a twist, gently squeeze the area with your hand to push air away from where you will apply pressure.
- Pull and Twist: When making a Lock Twist, pull the segments slightly away from the main balloon body. This reduces friction between the latex surfaces.
- Keep Cool: Latex becomes brittle in direct sunlight and sticky in extreme heat. Singapore’s humid weather can affect balloons, so work in a cool, indoor environment when possible.
- Check Your Hands: Ensure your fingernails are trimmed smoothly and remove rings that might snag the latex.
How Long Do Balloon Sculptures Last?
As a general rule, air-filled balloon sculptures will look their best for two to five days. Over time, air molecules escape through the latex. The balloon will shrink, become soft, and the surface will become matte or cloudy. This process is called oxidation.
Keeping the sculptures away from heat, sunlight, and active air conditioning vents will help them last longer.
Taking Your Balloon Art to the Next Level
Once you have mastered the dog, sword, and flower, you can start to experiment.
Simple Ways to Customise Your Creations
- Draw Faces: Use your markers to give your dog a happy expression or draw patterns on the flower petals.
- Combine Sculptures: Make a balloon dog and a smaller version of the balloon sword, then insert the sword between the dog’s front legs.
- Use Different Balloons: Try using printed balloons (polka dots, stars) for unique effects.
When to Call a Professional Balloon Artist
Learning how to make balloon sculptures for beginners is a fun hobby. It is perfect for entertaining a few children on a playdate. However, if you are planning a major event, such as a milestone birthday party, a baby shower, or a corporate family day, the DIY approach can become overwhelming.
Inflating and twisting hundreds of balloons takes hours of time and significant effort. For large-scale decorations like organic garlands, arches, backdrops, or intricate, multi-balloon centrepieces, professional expertise is required to ensure structural integrity and a polished look.
This is where a professional service offers immense value. You get breathtaking decor delivered and set up for you, removing the stress and allowing you to enjoy the celebration.
Conclusion On Making Balloon Sculptures For Beginners
Learning to make balloon sculptures is a rewarding skill that brings joy to any family event. By starting with the right tools, like 260Q balloons and a proper pump, and mastering a few basic balloon twists, you can create delightful DIY balloon animals and decorations. Remember to inflate correctly, twist confidently, and start with easy balloon sculptures like a dog, sword, or flower. While DIY is fun for small occasions, for those truly special celebrations where you want breathtaking designs without the effort, the experts at Bearloon are here to help. We transform parties with professional, custom balloon creations.
At BearloonSG, we believe that every celebration deserves a touch of wonder, a spark of joy, and a heartfelt surprise. We are more than just a gift shop – we are storytellers of celebration, crafting moments that stay with you long after the balloons have floated away.
Whether you’ve mastered the balloon dog and are ready for a full-scale party masterpiece, or you’d rather leave the twisting to the pros, we have you covered. Let us bring our expertise in custom balloons, flowers, and event decorations to your next celebration, ensuring a stress-free and magical experience.
It is the easiest way to guarantee a visually stunning event. Still have questions or are ready to plan your event? Feel free to contact us. We’re happy to help you create unforgettable memories. Visit BearloonSG to see our full range of services.
Frequently Asked Questions About Making Balloon Sculptures
What Is the Easiest Balloon Animal to Make?
The easiest concept is a balloon snake or worm, but for actual twisting, the balloon sword is the simplest as it requires only one loop twist and locking maneuver. Regarding animals, the classic balloon dog tutorial is the best starting point. While it has several steps, it uses the same repetitive lock twist for the ears, front legs, and back legs, making it excellent practice for beginners.
What Balloons Are Best for Sculpting?
The best balloons for sculpting are latex balloons specifically labelled “260” or “260Q”. Standard round party balloons will not work as they are designed to expand into a sphere, not a long tube. Professional brands like Qualatex are preferred because they are made from thicker, higher-quality latex, making them more durable and less prone to popping during the twisting process.
Do You Need a Special Pump for Twisting Balloons?
Yes, a pump is highly recommended. Modelling balloons require high pressure to inflate, which is extremely difficult and unsafe to do by mouth. A dual-action hand pump is the best tool for beginners. It inflates the balloon on both the up and down stroke, making the process fast and efficient.
How Do You Twist a Balloon Without It Popping?
To prevent popping, never inflate the balloon completely; always leave a tail for air displacement. “Burp” the balloon by releasing a little air before tying to soften it. When twisting, pull the segments slightly apart to reduce friction between the latex. Keep your hands clean, nails trimmed, and avoid twisting in direct sunlight or excessive heat.
What Are the Basic Balloon Twists?
There are four fundamental twists in beginner balloon art. The Basic Twist creates a single bubble. The Lock Twist joins two or more bubbles together to form joints. The Pinch Twist creates a small, distinct bubble used for details like ears. The Loop Twist creates a folded loop, used for items like flower petals or sword handles.
How Do You Make a Simple Balloon Flower?
To make a simple flower, use two balloons. With the first balloon, create a series of loop twists and connect them in a circle to form petals. With the second balloon (usually green), create a stem with a pinch twist near the top. Insert the pinch twist of the stem into the centre of the petal circle to connect the two parts.